Insect observation
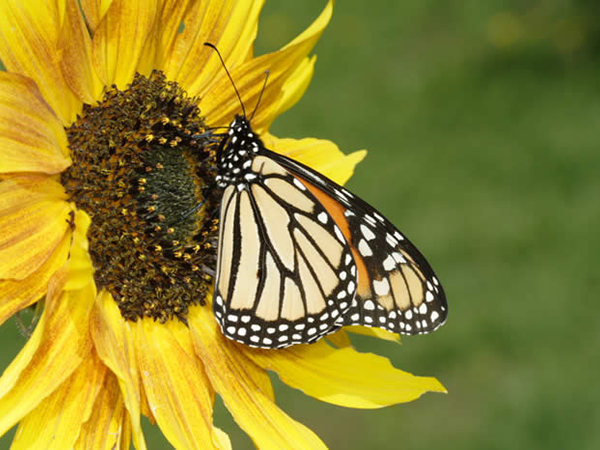
Monarch butterfly (Danaus plexippus)
Methods
The following methods have been developed by the Pollination Biology Research Group at Landcare Research and are reviewed on a regular basis to ensure we get the best data possible. We recommend that you check this site before commencing fieldwork to check for updates.
- This document outlines methods for flower visitor data collection in three phases of work
- Work with your trainer for the first two phases so you get all aspects of data collection correct
Note: A blossom is a functional unit for pollination and may consist of a group of flowers or one flower
Phase One:Familiarisation with the plants and insects
- Set up a transect with your trainer on the chosen site with good sun (see site selection)
- Your transect should contain 25–45 plants. Loop the finish back to where you started
- The plants need to be close together (more time counting – less time walking)
- Flowers/blossoms need to be at eye level or lower, or no more than 2 steps up on a stepladder
- Choose flowering plants that are accessible and in sun for at least part of the day
- Tag all plants clearly with a unique ID number made up of your initials and a number, starting at one, e.g. ‘ZW01’ – DO NOT CHANGE THESE – EVER! (See Phase Three for how to add or ‘remove’ plants from a transect as they come in or out of flowering) – if the same plant has been observed before, you need to use the same ID number assigned by the first observer
- If you know the plant’s botanical name you can use it or use an abbreviation such as NVS code – if not, then give the plant a ‘tag’ name that will allow you to find and identify it easily
- Collect plant herbarium vouchers early so that you do not miss the plant’s blossoming period – BUT do not collect rare/endangered plants!
- Collect all structures – flowers/blossoms, buds, fruit, (and roots for herbaceous/small plants)
- Press and dry the specimens – get help from a botanist or any Herbarium staff
- Organise identification – full scientific name or use your ‘tag’ name if you cannot identify the plant – get help from Herbarium staff – ensure ID number is included!
- Enter the voucher data onto the plant voucher datasheet: the transect plant ID number, date herbarium voucher collected, and photos for each plant (plant, branch, flower with ruler, flower without, flower close-up of stamens, stigma)
- Make a flower visitor checklist for each plant by making a complete collection of all representative insects for visiting each plant in your transect (see collecting insects) – this step is critical as these vouchers with your insect tag names are used at the data analysis stage. Do this for a few days until you are familiar with the insects and continue this in Phase Two. If you are not sure an insect is a new species (e.g. native bees) then collect more but don’t deplete the population! Some insects at your site may not be visiting transect plants – collect these labelled as ‘on the wing’ or collect a plant voucher if you collect off a plant so the plant can be formally identified.
- Pin, label and number insects – use Walker & Crosbie 1998 – have your pinning checked often by your trainer so you pin insects correctly (see pinning insects for a summary)
- Enter the following data onto the insect voucher datasheet: insect ID number, plant ID number or ‘tag’/botanical name for non-transect plants, date, time, location and site, altitude, insect ‘tag’ name and behaviour in flower
- Use your reference collection and insect identification books as you do your trial runs to learn how to identify what you count – remember to add any new insects as you find them
- Read user manual for Kestrel 4000 weather tracker and practise measuring stabilised wind speed (m/s), temperature (°C), relative humidity (%), and atmospheric pressure (HPa)
Phase Two: Trial runs for flower visitor observations
- Where there are two or more fieldworkers, you will need to designate one person as the ‘flower visitor observer’ and the others as ‘insect collector and/or photographer’ for the rest of the data collection – the observer must be the same person so estimations of relative visitor abundance are consistent
- The flower observer will do a trial run of the transect to:
- Use a quadrat (approx. 0.5 m2) to learn approximate size of sample area of flowers to observe
- Practise going around the transect making observations – if you cannot finish observing all your plants in 1½ hours, note how long it took and check with your trainer for which plants to drop
The ‘Near-Instantaneous Count’ method for observations is as follows:
- Wear dull-coloured clothes, avoid perfume, and stay out of the insects’ flight-path to reduce the effect of your presence
- First count birds/butterflies over the entire plant
- Pick sample area of blossoms on the plant that is in sun and has lots of visitors (= maximum data)
- Approach the sample area quietly, slowly, and do not let your shadow fall on the sample area
- Count the visitors actually on the flowers, then move closer to count small insects inside flowers
- If no visitors are present, mark this in the ‘Nil flower visitors’ column
- Record sun and rain data and any comments using a black pen or dark pencil
- Move on to next plant as soon as the count is finished and data recorded
- Count blossom/flower numbers for each plant at some stage each day (use the flower count datasheet)
- The insect collector works in a section of the transect following the flower observer, but at as big a distance as possible, to continue the plant reference insect voucher collection for each individual plant – ensure all data are recorded onto the insect voucher datasheet
- The photographer begins taking photos of the site and then the plant–pollinator interactions – recording plant ID and insect ID/behaviour for each photo for entry into the photo voucher datasheet. See Canon SOP for how to take good photos with a digital camera
- Where there is only one fieldworker, the focus needs to be on data and insect collection
- Use time at the end of each observation run to count blossoms/flowers for that day or collect insects
- In the evening, arrange pinned/labelled insects in boxes and check for any gaps in representative samples of insect visitors for each plant in your transect
- Check regularly with the trainer to ensure insect IDs and counts are accurate, and that photos are in focus and close enough to see what the insect is doing – only take photos if you are fully competent with the camera, and make efforts to correct problems such as underexposed or out-of-focus images
Tips to the Trainer (see training objectives)
- Ensure vouchers and photos for all plants in the transect and the site are collected
- Check competency for collecting and photographing vouchers for plants and insects
- Make sure identifications and counts for observations are accurate (esp. NZ flies versus bees)
- Ensure flower visitor checklist has vouchers that represent all visitors to each transect plant
Phase Three: Collecting data for flower visitor observations
- Observations are done in sample sets of whole days at four specified times: 0900, 1100, 1300 and 1500 hours. Do not deviate from these times, but you can add observation times earlier and later in the day at 2-hour intervals. Use rest periods between transects for lunch/snacks as well as insect and photo voucher collection
- Record weather readings at the start and end of each transect, using the Kestrel pocket weather meter and subjective judgements, on flower visitor observation sheet
- Use the datasheet flower visitor observation sheet and starting at plant 01:
- Make a ‘near instantaneous count’ of all categories of visitors – the observation data are designed to assess visitor abundance relative to other main categories of insects – so it is important to be consistent in how you do the counting
- Use the ‘special new categories’ columns to count any distinctive and regular/abundant visitors that are not already on your datasheet columns – identify these with a ‘tag’ name and ensure you have voucher specimens for identification of these new categories
- Count the number of open blossoms/flowers at some stage during the day and recount if you are using a different area of the plant from previous sample area (following the sun) and the numbers are different (use flower count data sheet)
- Over time some plants will stop flowering and others will start:
- Depending on the time available for your 1½-hour transect, add any newly flowering plants by inserting a row in the Excel datasheet in their proper order using decimal ID numbers as follows: if a new plant is added between plants 03 and 04, the new plant will be called 03.5 and if there is a second one before plant 04 it will be called 03.7. This keeps the number of the position of the plant in the proper order so that you can follow and remember the transect sequence easily based on your datasheet
- Print or hand-write a new datasheet each day that is adjusted with added plants and their decimal ID numbers – drop plants from your transect only if they have disappeared (been removed/eaten) because sometimes a plant will stop flowering and then start again later
- To ensure security of your data, use two backup methods:
- Enter data into database as soon as you have computer access (at end of each day is best)
- Photocopy datasheets – keep a copy for yourself and one in a separate place or with site leader
- Aim for a minimum of 10 days of observations, but ideal replicates are 20–30 days. These sample sets should be in the same part of the season preferably (e.g. within 5–6 weeks)
- Indoor activities for cold, rainy, windy days – blossom visitors won’t be out on those days either!
- Pin insects and enter insect voucher data
- Include some ‘borderline days’ to see which visitors are able to tough it out – if you find there are still pollinators visiting, include some more of these days
Special collections: Early-morning and night-time pollinators
- Most countries have few data on night visitors to flowers (e.g. in New Zealand almost no data have been collected on moth pollination at night (see Newstrom & Robertson 2005). It is a challenge to see the moths in action because dusk and night moths are only out on very warm, still, lovely evenings and then they can come in droves. They will be attracted to sweet-smelling plants
- It is a major time commitment to count moths (sample sizes will be low) so it is best to get data by only collecting vouchers of what is there and documenting their actions with photographs
- Try your best to get a minimum of 3 nights of moth pollination
- This work takes two people for safety with one person collecting and one person photographing
- Use collected data for the visitor checklist only and not for monitoring population abundance
- Early morning is a challenge only because you have to get up early. And it is usually not worth it as there are few pollinators. But you never know – there just might be some amazing early morning insect that no one in your country knows about. For example, some bees forage only just after dawn or start very early (e.g. bumblebees are out by 0700 hours no matter what) and they might be getting all the nectar before the native bees get a chance
- Try your best to get a minimum of 3 days with early-morning observations
- Take vouchers of what is there on each plant and take some photos of anything you have not yet captured in action during the day.
- This work takes only one person. Not too much is happening in the morning but we have to prove it by being there a few times